Volcano photography tips for Costa Rica
Best time for volcano photography?
Dawn for mist + dramatic lighting; dry season Dec-Apr for clear summits.
Light, timing, and patience: the three pillars of volcano photography
Costa Rica’s volcanoes are among the most photogenic landscapes in the Americas — but they are also among the most humbling for photographers. A volcano that glows dramatically in early-morning light can vanish completely under a cloud cap by 9am. A clearing that produces stunning rays at Irazú one day can be solid fog the next. Photographing these landscapes well requires understanding the local weather dynamics, knowing which viewpoints suit which conditions, and accepting that the best shots often require waking before 5am.
This guide is organized by volcano and time of day. Whether you are shooting on a dedicated photography trip or just want better images on your family holiday, the principles here will help you bring home something beyond the standard tourist shot.
Arenal: the most photogenic cone in the country
Arenal’s near-perfect conical form is a gift for photographers. The challenge is catching it without cloud. The cone sits in a rainforest environment that generates its own cloud cover, and the summit can disappear even on meteorologically clear days. Here is how to maximize your chances.
Dawn at Arenal (best window: 5:30-8am)
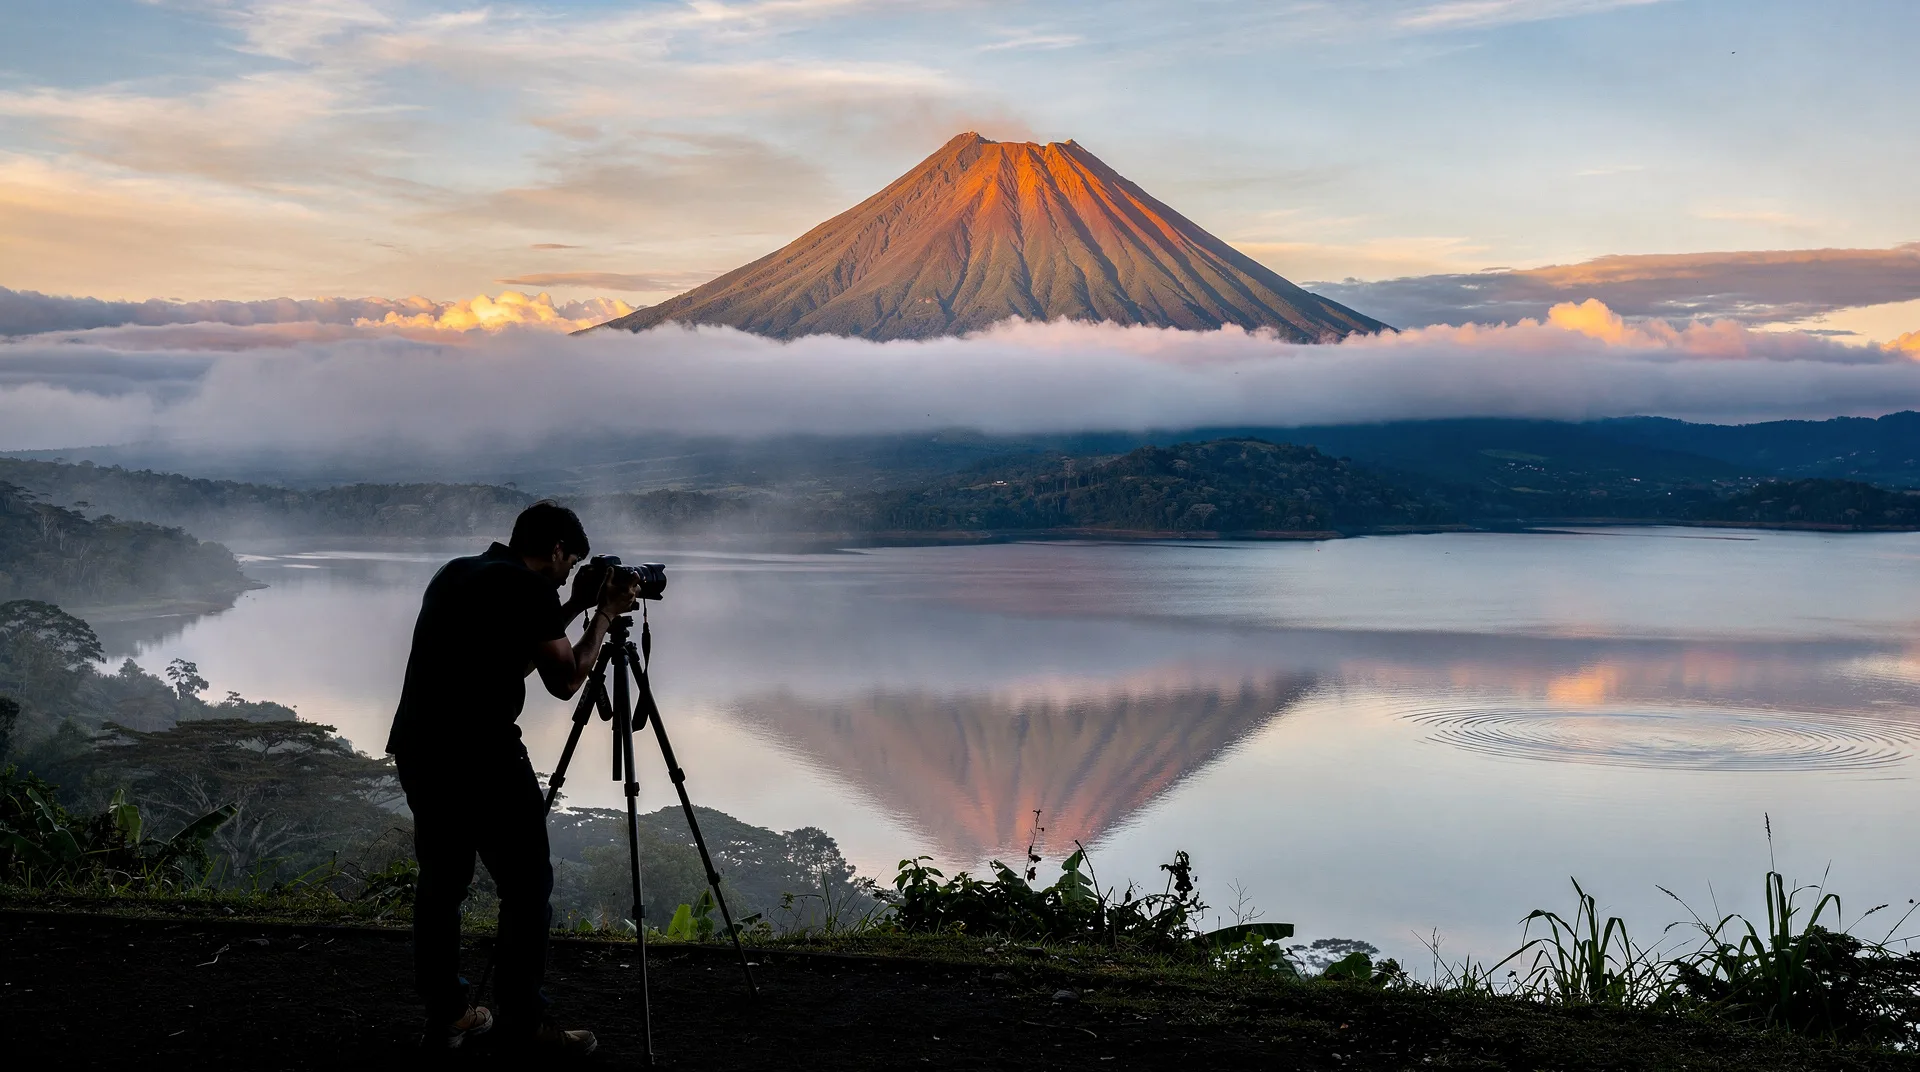
The single most productive time to photograph Arenal is the hour before and after sunrise. During this window, residual overnight cold creates mist banks at the base of the cone — often forming a spectacular “floating” effect where the summit appears above a sea of white cloud. Golden light from the east hits the cone’s east face. The La Fortuna main street, oriented directly toward the volcano, frames the cone at the end of a canyon of low buildings, creating a classic composition.
For lake reflections, drive the northern shore of Lake Arenal (about 15-20 minutes from La Fortuna town) and find one of the pullouts near Nuevo Arenal. Calm mornings produce mirror reflections of the cone on the lake surface — extraordinary in flat, pre-dawn light.
Sunset at Arenal (best window: 5-7pm)
The cone is lit from the west at sunset, and passing storm cells can create dramatic contrast — dark cloud, orange light, and the dark silhouette of the cone. From the La Fortuna central park, or from any elevated viewpoint south of town, afternoon storms sometimes create rainbow arcs with the volcano as backdrop. This is genuinely unpredictable but spectacular when it happens.
Night photography at Arenal
Long-exposure photography of the cone at night is possible but challenging. Light pollution from La Fortuna is low enough for some Milky Way shooting from the lake shore. The cone silhouette makes a strong compositional anchor for astro-photography between 10pm and 3am during new moon phases. A sturdy tripod and an exposure over 25 seconds will show star trails above the cone.
La Fortuna: waterfall, Arenal Volcano and hot springs tour — from $95Best Arenal photography spots
- La Fortuna town central park: classic cone framed by street, excellent at dawn
- Lake Arenal north shore: reflections, dawn mist, wide compositions
- Arenal Observatory Lodge decks: closest public viewpoint to the cone
- Mirador Arenal: a commercial viewpoint on the road toward the national park, with unobstructed southern views
Poás: crater drama and unearthly colours
The hyperacidic lake of Poás’s main crater produces colours — turquoise, white, sulphur-yellow — that read as almost artificial in photographs. The challenge is getting there before the cloud fills the crater and staying long enough to catch gas plumes rising from the lake surface.
Dawn at Poás (best window: 8-9:30am)
Poás Volcano National Park opens at 8am — and that is exactly when you should arrive. The park limits time slots to 30-minute windows at the crater viewpoint, and early morning slots (first group of the day) consistently produce the clearest views. On many days, cloud rolls into the crater from the Atlantic side by 10am, obscuring the lake entirely by mid-morning.
Photography from the viewpoint platform is challenging due to glass barriers installed for visitor safety. Shooting through or over the barrier is possible with a wider-angle lens held at the right angle. Telephoto lenses are useful for isolating the lake’s texture and gas plume details from a distance.
Composition ideas at Poás
- The lake surface with steam plumes at varying heights — isolate with telephoto compression
- The crater rim vegetation (stunted cloud-forest plants, orange with sulfur deposits) as foreground leading to the lake
- Wide-angle view showing the scale of the crater with tiny figures on the viewpoint platform
- The Botos Lagoon trail: the extinct crater’s clear water and cloud-forest reflections
Practical note: Protect your camera gear at Poás. Sulfuric gas in the air is corrosive. Keep lenses capped when not shooting. A UV filter on your front element provides minimal protection but is better than nothing. Metal camera bodies and tripods should be wiped down after visiting the crater viewpoint.
Irazú: altitude light and the dual-ocean moment
Irazú’s photographic appeal is different from Arenal and Poás. The summit zone has an eerie, almost monochromatic quality — grey volcanic soil, green-black sulfuric lake, white gas plumes, and the pale blue sky at 3,432 metres. The dual-ocean view (visible on clear mornings) requires patience and clear conditions, but when it appears, it is one of the most remarkable vistas in Central America.
Dawn at Irazú (best window: 7-8:30am)
Arrive at the park when it opens at 8am (or earlier, waiting at the gate). The main Diego de la Haya crater is a 5-minute walk from the parking area. Clear conditions at this hour give you a chance of seeing the lake through clear air before Atlantic cloud begins to build from the east. Pacific cloud, which builds later in the day, comes from the west — the first hour after sunrise is often the clearest.
The “dual coast” view is rarely dramatic in the photographic sense — both ocean glimpses are usually hazy horizons rather than crisp lines. The photographic payoff at Irazú is more in the landscape itself: the barren crater moonscape, the lake’s acid-green colour, and the dramatic cloud formations that roll over the rim.
Composition ideas at Irazú
- The Diego de la Haya crater lake with the rim silhouette — shoot from different positions around the rim (staying on designated paths) to find the best angle in available light
- The secondary Playa Hermosa crater (dry, sandy floor) in morning light — dramatic minimalist composition
- The cloud-forest vegetation on the upper slopes (3,000-3,200 m) in mist — ethereal and unusual
- The parking area and visitor center in cloud/mist for scale and atmosphere
General volcano photography techniques
Work the weather, don’t fight it
The most common mistake is arriving at a volcano on a clear day, getting mediocre blue-sky shots, and leaving. The best volcanic photography happens at the intersection of weather and light — clearing mist, side lighting through cloud gaps, rainbow arcs after rain. Spend more time at viewpoints than you think necessary. The light changes constantly.
Gear recommendations for Costa Rican volcanoes
- Wide-angle lens (16-35mm equivalent): Essential for crater context and landscape compositions
- Telephoto (70-300mm): Compresses gas plumes at Poás, isolates crater details at Irazú
- Polarizing filter: Cuts glare on sulfuric lakes, deepens sky contrast
- Solid tripod: Dawn and dusk shots require stability; also useful for HDR bracketing at craters
- Weather sealing: Mist and occasional rain are inevitable; a weather-sealed body protects your investment
- Extra batteries: Cold temperatures at Poás and Irazú drain batteries faster
Timing rules of thumb
- Arrive before park opening and wait at the gate
- 6-9am is the golden window at all three main volcanoes
- Overcast days with occasional cloud breaks often produce better shots than perfectly clear days (diffused light, no harsh shadows)
- Dry season (December-April) gives more clear mornings; green season gives more dramatic atmospheric conditions
Photographing Chirripó: the alpine world
Chirripó at 3,820 metres offers a completely different photographic world — sub-alpine páramo, glacial lakes, and 360-degree views. Dawn from the summit is one of the most photographic moments in the country. See our Chirripó hiking guide for logistics. Bring your gear in a weatherproof bag for the ascent, and budget time on summit day for the light before the sun fully rises.
The Chirripó massif produces extraordinary cloud inversion shots in clear conditions — looking down over a sea of cloud from the summit, with surrounding peaks rising above it. This effect is most reliable in the early dry season (December-January) when temperature differentials between the cold summit and the humid lowlands below are greatest.
Rincón de la Vieja: photographing volcanic mud and fumaroles
Rincón de la Vieja’s Las Pailas sector is the best location in Costa Rica for close-up photography of active volcanic features. The mud pools (pailas — literally “pots”) bubble continuously with a viscous, grey-beige mud heated by subsurface geothermal activity. Small sulfuric fumaroles vent steam from cracks in the earth nearby. The combination makes for an entirely different volcanic landscape from the summit craters of Poás or Irazú.
Photography tips for Las Pailas:
The mud pools are best photographed in morning light (arriving with the park opening at 8am) before trail traffic creates too much movement around the viewpoints. A telephoto lens allows you to isolate individual mud bubble “explosions” — slow shutter speeds of 1/30s to 1/60s capture the motion blur of bubbling; faster shutter speeds (1/500s+) freeze individual mud droplets mid-arc.
Protect your camera from the sulfuric environment — keep lens caps on except when shooting. Bring a sealed plastic bag as a backup for lenses. Do not change lenses near the fumaroles.
The small cold lagoon at Las Pailas produces good reflection shots in calm conditions. The surrounding dry forest (Rincón is in Guanacaste, the drier Pacific sector) has a very different visual character from Arenal’s lush rainforest — useful contrast for visual variety in a multi-volcano photo essay.
Photographing Tenorio and Río Celeste
Río Celeste’s turquoise blue colour is one of the most photogenic natural phenomena in the country — and one of the most challenging to reproduce accurately in photographs. The colour is real (produced by the scattering of light on volcanic nanoparticles at the confluence point Los Teñideros), but cameras often struggle with the white balance required to capture the exact turquoise accurately.
Technical tips for Río Celeste photography:
Use a circular polarizer to reduce water surface reflections and deepen the colour saturation. Shoot in RAW format to give maximum latitude for colour correction in post-processing. The colour reads differently under different light conditions — overcast flat light often produces truer colour representation than direct sunlight, which can create glare on the water surface.
The waterfall at Río Celeste is best photographed with a slow shutter speed (1/4s to 2s with a tripod) to soften the water flow. The turquoise lagoon below the waterfall is accessible from the trail and makes the strongest composed shot when the turquoise water is visible in the foreground and the forest frames the background.
The trail is busy — plan your photography windows for early morning (first entry, 8am opening, maximum 2-hour window before crowds build) or late afternoon (last entry is mid-afternoon; few visitors arrive late in the day). See our Tenorio National Park guide for timing logistics.
Post-processing: matching the reality to the image
Costa Rica’s volcanic landscapes are high-contrast environments — bright sky, dark rock, white steam plumes, colourful crater lakes. Standard camera exposures tend to blow out highlights (the sky) while preserving shadow detail, or vice versa. A few post-processing strategies help:
HDR for crater shots: Bracket exposures (3-5 shots at -2, -1, 0, +1, +2 stops) at Irazú and Poás craters to capture full dynamic range. Merge in Lightroom or Photoshop’s HDR mode. Avoid over-processing — natural HDR is the goal.
Dehaze for mist: Arenal’s cone viewed through morning mist often looks flat in straight RAW files. Lightroom’s Dehaze slider (positive values) recovers contrast and clarity in misty images. Use judiciously.
White balance for Río Celeste: Shoot in RAW and experiment with custom white balance settings in post-processing. The colour typically reads as turquoise in the 5,000-6,500K range — cooler white balance enhances the blue-green character; warmer settings shift it toward green.
Long exposure for hot springs: Arenal’s Tabacón and similar hot springs photograph beautifully with long exposures at blue hour (30 minutes before sunrise or after sunset) — the steam appears as soft, flowing wisps, the water surfaces smooth, and the surrounding jungle is lit by the pools’ ambient glow.
Frequently asked questions about volcano photography in Costa Rica
What is the best volcano to photograph for beginners?
Arenal is the most forgiving — the cone is visually dramatic from distance, accessible from the town, and surrounded by infrastructure (viewpoints, lodges, lake). Beginners get usable shots more reliably than at Poás (where cloud timing is critical) or Irazú (where the aesthetic is more abstract). Start at Arenal, refine at Poás.
Can I bring a drone to Costa Rica’s volcanoes?
Drone operation near active volcanoes is prohibited in Costa Rica. Arenal, Poás, and Irazú national parks all restrict drones. Check the SINAC regulations before bringing equipment, as fines for unauthorized drone operation in parks can be substantial.
Is the Poás crater viewpoint good for photography despite the barriers?
The barriers are challenging but not prohibitive. A wide-angle lens can shoot over or through glass barriers. Longer focal lengths can eliminate barrier interference by focusing behind it. Shoot at an angle to the glass when possible. The early morning light and clear air on first-slot visits compensate for the barrier constraint.
What permissions do I need for professional or commercial photography?
Professional photography shoots (for editorial or commercial use) in SINAC-managed parks require a separate permit. Contact the specific park administration in advance. Documentary and personal social-media use with standard camera equipment does not require special permission.
Related guides
To understand what you are photographing, read our understanding Costa Rica’s volcanic activity guide and best volcanoes in Costa Rica overview. For wildlife photography across all of Costa Rica, our wildlife photography tips guide covers ethical practices and camera settings for fast-moving subjects. Planning your visit around the best light? Our best time to visit Costa Rica guide gives the seasonal overview by region.