Wildlife photography tips for Costa Rica
What camera gear and ethical approach work best for wildlife photography in Costa Rica?
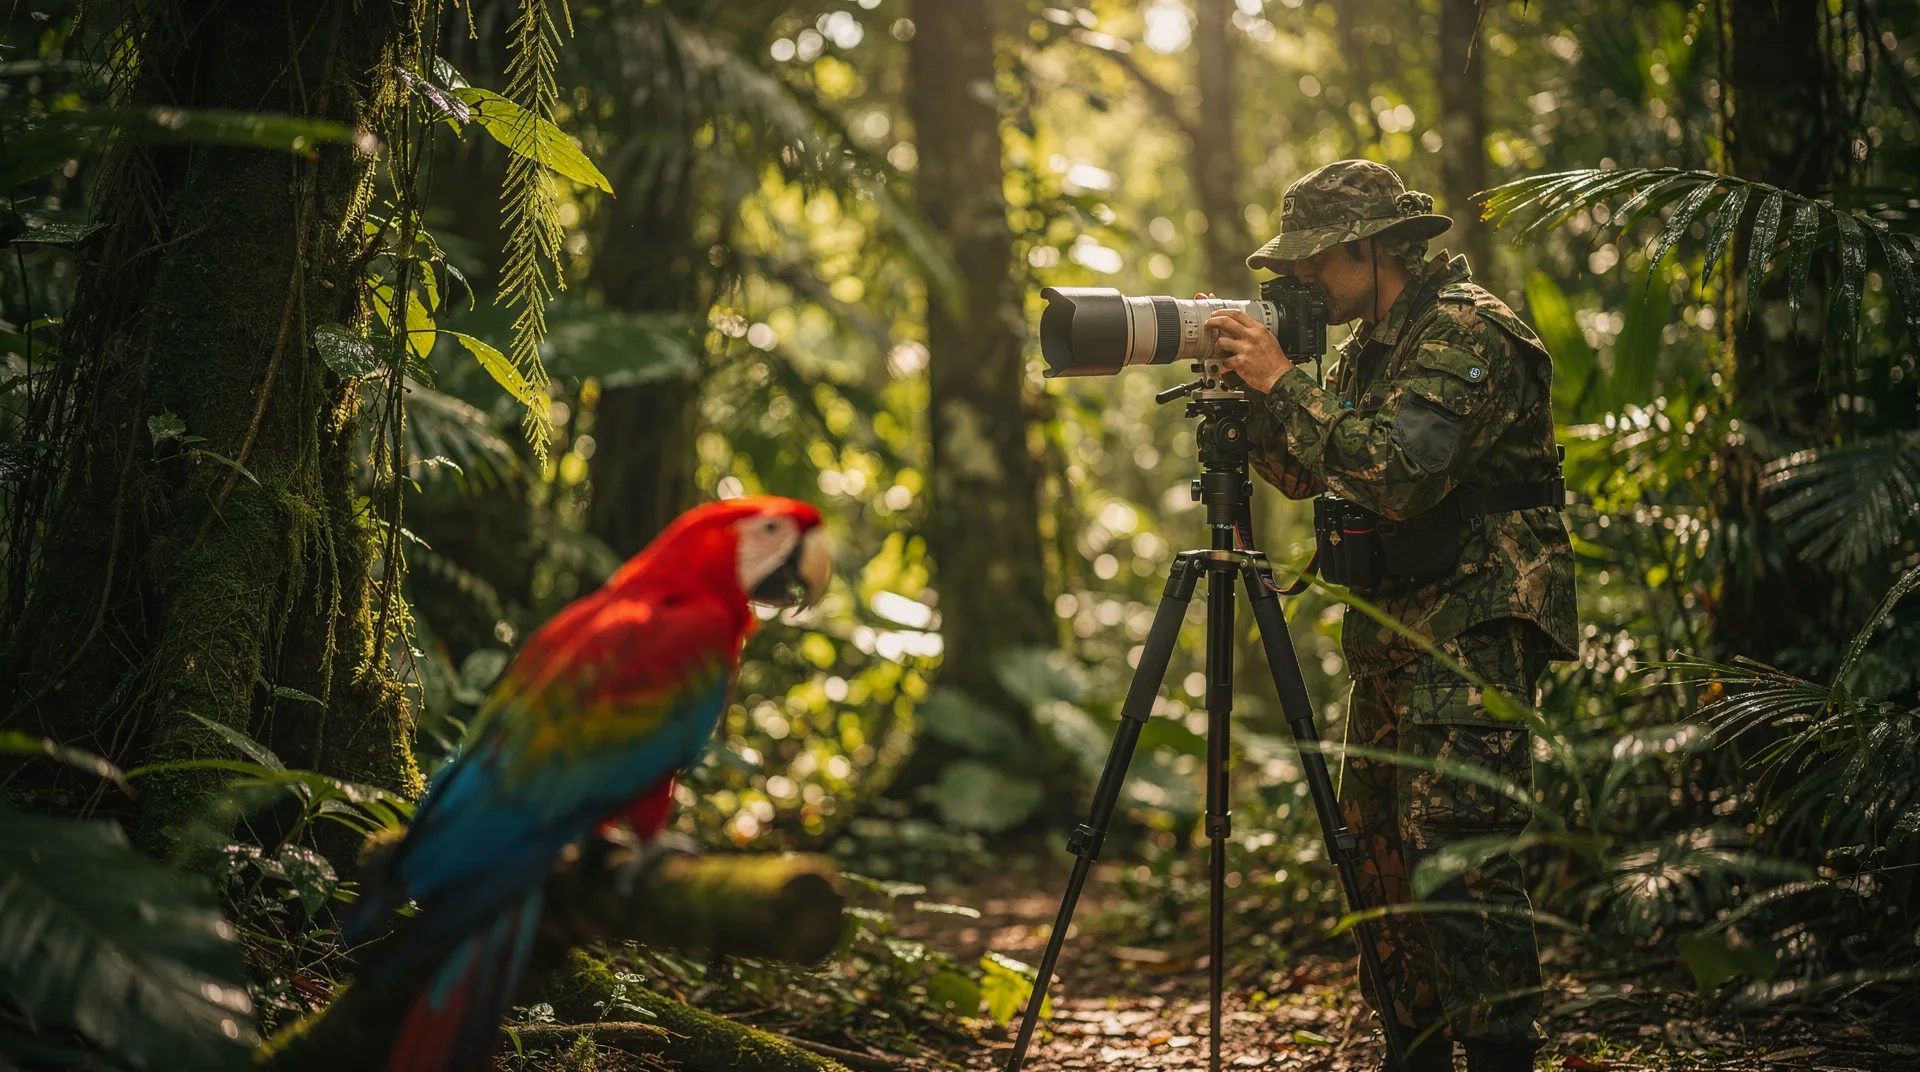
A mirrorless or DSLR with a 100–500mm telephoto covers most subjects; add a macro lens for frogs and insects. Ethical priorities: no flash on nocturnal animals' eyes, no feeding for proximity, no trail deviation. Early morning light and a certified naturalist guide consistently produce the best results.
Photography in one of the world’s most photogenic ecosystems
Costa Rica is a photographer’s dream and a photographer’s challenge in equal measure. The wildlife density is extraordinary, but the conditions — deep shade, fast-moving subjects, rain-streaked lenses, and the compression of a full sky in a 20-metre canopy — require deliberate gear choices and technique adaptations.
This guide is practical, not theoretical. It covers what equipment works in specific Costa Rican ecosystems, how to use a guide to maximise photographic opportunities, the ethical rules that protect both the wildlife and your reputation as a photographer, and the specific locations where the light and subjects align most favourably.
Camera systems: what works in the field
Mirrorless vs DSLR
Both systems produce excellent results. Modern mirrorless cameras from Sony, Canon, Nikon, and OM System have largely closed the autofocus gap with DSLRs for wildlife — the Sony A7R V, Nikon Z8, and Canon R7 all track fast-moving birds and mammals effectively. The weight advantage of mirrorless becomes significant on a 12-kilometre Corcovado day hike or a multi-hour trail walk in humidity that will test the endurance of any photographer.
For travellers who already own a capable DSLR (Canon 7D Mk II, Nikon D500, D7500), there is no compelling reason to upgrade before a Costa Rica trip. Both will perform well.
Telephoto lenses
The single most important lens choice. Recommendations by use case:
Birds in forest canopy: 400mm–600mm. The Sigma 150–600mm Contemporary and Tamron 150–600mm G2 offer excellent reach at manageable weight and price. Native lenses (Canon RF 100–500mm, Sony 200–600mm) deliver faster autofocus at higher cost.
Mammals and sloths: 100–300mm is usually sufficient. Mammals tend to be closer and slower than birds. A 70–300mm can work for Manuel Antonio’s approachable capuchin monkeys.
General wildlife: A 100–500mm range covers most scenarios. The versatility of zoom over prime lenses is more valuable in a field situation where subjects change size and distance rapidly.
Frogs and insects (macro): A dedicated 90–105mm macro lens is worth the extra pack weight if insects and amphibians are a priority. Otherwise, a close-focus telephoto at 300mm or the close-focus distance of a 100–400mm zoom can substitute.
Weather sealing
Costa Rica will test your gear. The wet season brings daily afternoon rain, morning mist, and humidity so high that condensation forms on lenses transitioning from air-conditioned vehicles to forest. Weather-sealed bodies and lenses significantly reduce stress. Carry silica gel packets in your camera bag, and allow gear to equilibrate to ambient temperature before shooting to prevent internal fogging.
A rain cover for your camera and lens — even a plastic bag with a rubber band — is worth carrying at all times in wet season.
Tripods and monopods
A full tripod is rarely practical in forest conditions — most shooting happens quickly and the terrain is uneven. A monopod is a worthwhile compromise for long telephoto lenses. Image stabilisation in modern lenses reduces the need for support considerably, particularly for static or slow subjects like sloths and resting birds.
For dawn photography where you need stability in very low light, a Joby GorillaPod or a lightweight travel tripod can position on an uneven root or trail surface.
Smartphones
Modern flagship smartphones (iPhone 16 Pro, Samsung S25 Ultra) are genuinely capable of recording wildlife encounters and produce excellent short-video content. Their limitations appear in dim canopy conditions (small sensors struggle with noise), and the fixed focal length means close approach is required — which creates ethical issues with wild subjects. Use a smartphone for social content and context; use a proper camera for the images you intend to print or submit.
Lighting in Costa Rican ecosystems
Rainforest canopy — the fundamental challenge
Lowland rainforest canopy is dark. At 10am on a sunny day, the forest floor under a closed canopy receives 1–2% of the light available in an open clearing. At 50m in a tree, the light is better — but subjects are small and 600mm telephoto shots at f/6.3 in those conditions often require ISO 3200–6400.
Embrace high ISO. Modern cameras are excellent at 3200; acceptable at 6400; challenging but workable at 12800 in good files. Noise reduction in post-processing (Lightroom, DxO PhotoLab) recovers significant detail from high-ISO frames. Reject the cultural prejudice against high ISO — a sharp, slightly noisy photograph of a quetzal beats a blurred, “clean” one at any time.
Shoot wide open. f/5.6–f/6.3 on a long telephoto is appropriate for most canopy birds. Background blur is aesthetically desirable anyway; closing down the aperture in already-dark conditions gains nothing.
White balance. Forest light is green-shifted. Custom white balance, or shooting in RAW and correcting in post, prevents the green cast that makes forest photographs look muddy.
Cloud forest — diffuse, even, beautiful
Cloud forest light, filtered through perpetual mist, is actually flattering for wildlife. The shadowless quality makes feather detail visible without the harsh contrast of direct sun. The downside is that mist reduces contrast and can obscure background detail that helps identify locations. Shoot during mist breaks — the minutes after a cloud passes are often productive.
Open habitats — beaches, rivers, estuaries
Beach and river wildlife (crocodiles, herons, shorebirds) benefits from the most forgiving light. Morning and late afternoon produce warm, angled light with long shadows that add texture. The Tárcoles River at dawn — crocodiles, herons, kingfishers, and the possibility of Boat-billed Herons — is as close to a controlled wildlife photography situation as Costa Rica offers.
Working with a naturalist guide
Why guides multiply photographic opportunities
A licensed naturalist guide does not just find animals — they create photographic opportunities that would never occur on an independent walk.
Experienced guides know which animals are calm near observers (howler monkeys, iguanas, crocodiles, sloths) and which are flighty (birds, squirrel monkeys). They position groups downwind, approach slowly from the animal’s blind side, and signal the photographer when the moment is right. For bird photography specifically, a guide who calls a bird in using playback (where legal and ethical) can produce frame-filling shots impossible from a walk-and-scan approach.
Guides also prevent wasted time. Rather than searching 2 hours for one bird, you can spend 45 minutes on four different species because the guide’s knowledge eliminates the uncertainty.
a naturalist-led walking tour in Manuel Antonio — one of the most photography-productive parks in the country — from $65 a certified guide-led day tour at Corcovado’s Sirena station, mandatory and essential for productive wildlife photography — from $135 a bird-watching tour from Drake Bay with a specialist naturalist guide on the Osa Peninsula — from $95Communication before the walk
Before starting, discuss with your guide: your photographic priorities (birds vs mammals vs frogs vs insects), your equipment (so they understand reach and minimum focus distance), your preferred pace (photographers often want to linger longer than non-photographers), and whether you have any ethical concerns about playback or flash use. A five-minute conversation at the trailhead transforms the guide’s approach from general naturalist to photographic assistant.
Ethics: the non-negotiable rules
No flash on nocturnal animals’ eyes
Direct flash aimed at the eyes of nocturnal animals — frogs, owls, kinkajous, sloths — causes temporary retinal overstimulation equivalent to a strobe light aimed at human eyes in a dark room. It does not cause permanent blindness, but it causes significant stress. Diffuse your flash (a small dome diffuser costs $20 and fits in a pocket), bounce it, or use ambient torchlight with high ISO rather than direct flash.
Red-eyed tree frog photographs look better with diffused flash anyway — the harsh shadows from direct flash eliminate the dimensional quality that makes amphibian macro photography interesting.
No feeding for proximity
Never allow a guide (or other tourists) to feed animals to get them closer. Capuchin monkeys in Manuel Antonio, coatis, raccoons, and white-nosed coatis have all been habituated through food provisioning to approach closely — but the same provisioning makes them aggressive, creates disease transmission risks, and eventually leads to animals being destroyed when they bite a tourist. Walk away from any operator or guide who uses food to attract wildlife.
No trail deviation
Stepping off established trails causes compaction damage to root systems, disturbs ground-nesting birds and invertebrates, and exposes you to unexpected encounters with venomous species that rest under leaf litter. The best wildlife photographs from Costa Rica are taken from the trail — the forest is typically close enough on both sides that you do not need to enter it.
Nest and den sites
If your guide finds an active nest with eggs, chicks, or a denning mammal, the ethical maximum is a brief observation at distance and a quiet departure. No photography that involves approach within ten metres. The breeding season stress response in birds — even to non-threatening stimuli — causes nest abandonment at measurable rates when disturbance is repeated. Document the species, note the location, move on.
Best locations for wildlife photography by genre
Birds in flight
The Tárcoles River estuary at dawn produces Boat-billed Herons, Roseate Spoonbills, and Magnificent Frigatebirds in morning light. Manuel Antonio’s coastal trail at dusk produces scarlet macaws banking over the canopy. The Caño Negro boat tour produces Jabiru storks and Anhingas. Birds in flight require continuous autofocus, burst shooting, and a shutter speed of at least 1/1600s.
Primate portraits
Howler monkeys in Cahuita and Tortuguero sit long enough for careful composition. Spider monkeys at Corcovado require fast tracking. Squirrel monkeys at Manuel Antonio move quickly through lower canopy — a wide-aperture 300mm lens with fast autofocus is necessary. White-faced capuchins in Manuel Antonio are sometimes uncomfortably close — carry a medium telephoto minimum, not a wide angle, which exaggerates distortion.
Macro — frogs and insects
A 90–100mm macro lens on a monopod, at dawn along a stream in cloud forest, is the setup for glass frogs. Red-eyed tree frogs on night walks are best photographed with flash — use a ring flash or off-camera flash held to one side and diffused. For Blue Morpho butterflies at mud-puddling sites, approach from downwind, crouch slowly, and shoot at 300–500mm from two metres distance before moving gradually closer as the animal acclimates.
Sloths
A spotting scope eyepiece adapter turns your phone camera into a telephoto for stationary sloth portraits — guides often have these available. Without a scope, the 400–600mm range is appropriate for typical viewing distances (8–25 metres in canopy). Sloths are slow enough that camera shake is the main limitation, not subject movement. Use image stabilisation and shoot multiple frames.
What to do when the light is terrible
Morning fog in cloud forest is not a photography obstacle — it is an opportunity. Fog produces atmospheric, mood-heavy imagery that clear-sky photographs cannot replicate. Set exposure compensation to +0.5 to +1 stop to prevent grey fog from rendering as muddy mid-tones. Focus manually on near subjects when contrast-detection autofocus struggles in low contrast conditions.
Heavy rain mid-afternoon (almost guaranteed in wet-season Pacific Costa Rica) is a good time to move inside for a downloaded GPS trail map review, menu planning, or telephoto cleaning. Do not attempt extended photography in heavy downpours unless your gear is rated to IP67 or above — even weather-sealed gear has limits.
Frequently asked questions about wildlife photography in Costa Rica
Should I bring a dedicated camera or rely on my smartphone?
If photography matters to you, bring a camera with a telephoto lens. The difference between a smartphone image and a 500mm telephoto image of a bird in canopy is not marginal — it is the difference between documentation and a photograph. If photography is secondary to the experience itself, a flagship smartphone and a pocket-sized wildlife identification app are perfectly adequate.
Is a telephoto zoom or a prime lens better for Costa Rica?
Zoom. The versatility of a 150–600mm or 100–500mm zoom outweighs the optical advantages of a prime in a field situation where subjects vary from 3 metres to 50 metres without warning. The only exception is if you specialise in macro — a 90–100mm macro prime is worth bringing for frog and insect work.
Do I need to carry rain covers for all my gear?
Yes. Even in the dry season, afternoon showers can appear in 20 minutes at cloud forest elevations. A camera rain sleeve ($15–30 from LensCoat, Op/Tech, or similar brands) or an improvised clear plastic bag provides sufficient protection for brief showers. For sustained rain in a Corcovado-scale expedition, a proper rain cover is essential.
Can I sell photographs taken in Costa Rica’s national parks?
Photographing wildlife in national parks for personal use and portfolio purposes is unrestricted. Commercial licensing of images taken in parks technically requires an ICT press credential for commercial shoots, but enforcement for individual photographers publishing stock or editorial images is minimal. Large-scale commercial production within parks requires formal permission from SINAC.
What is the single best location in Costa Rica for wildlife photography?
Corcovado’s Sirena sector, with no competition. The wildlife density, the absence of other tourists (relative to Manuel Antonio), the forest quality, and the guide-wildlife familiarity built up over decades creates photographic opportunities that simply do not exist elsewhere in the country. The logistical investment — boat from Drake Bay, mandatory guide, reservation months in advance — is justified by the results.
How do I find a guide who is specifically good with photography groups?
Ask specifically when booking. Not all naturalist guides pace a walk the way photographers need — most groups walk faster than optimal for photography. Request a guide experienced with photography groups and confirm they understand the need for longer stops, slower pace, and communication about approaching angles. Several Monteverde and Manuel Antonio operators specifically advertise photography-focused guided walks.
What is the best time of year for wildlife photography in Costa Rica?
It depends on the subject. Quetzal nesting at San Gerardo de Dota peaks April–June. Sea turtle photography at Tortuguero is best July–September. Amphibian photography peaks during the wet season (May–November). Dry-season Pacific coast (December–April) offers more predictable weather for all-day fieldwork. Read best time to visit Costa Rica for the full seasonal picture.
How do I protect my camera from tropical humidity?
Store camera bodies with silica gel packets in a sealed dry bag or camera bag when not in use. In extremely humid conditions (Caribbean coast, cloud forest), internal fogging of lenses can occur — allow gear to equalise to ambient temperature gradually rather than exposing cold gear directly to warm humid air. A UV filter on your lens front element provides some protection against mist and light rain. For long-term storage, a dehumidifier cabinet is the professional solution but unnecessary for a 1–2 week trip.
Where can I get sharp images of sleeping birds?
Night tours in Monteverde, Arenal, and the Caribbean coast regularly find sleeping birds perched on exposed branches 1–3 metres from the trail. Nightjars (Common Pauraque) roost directly on roads and paths, completely motionless. These are ideal low-speed subjects — use a monopod or tripod for stability at ISO 800–1600, and diffuse your fill flash significantly to avoid harsh shadows.
Related guides
Wildlife photography builds on wildlife knowledge: bird watching by region maps the best locations for your photographic targets; nocturnal wildlife guide covers the specific challenges of after-dark photography; butterflies and frogs guide addresses macro photography opportunities specifically; quetzal watching guide covers the most sought-after single photography subject in the country; where to see sloths helps plan for these reliably stationary subjects; and Costa Rica wildlife overview provides the ecological context for understanding animal behaviour patterns that directly affect photographic success. For itinerary planning around photographic goals, the 14-day wildlife photography itinerary builds a route covering Tortuguero, Sarapiquí, Monteverde, San Gerardo de Dota, and the Osa Peninsula.